

DIY festive face masks
- Dec 7, 2020
- 3 min read

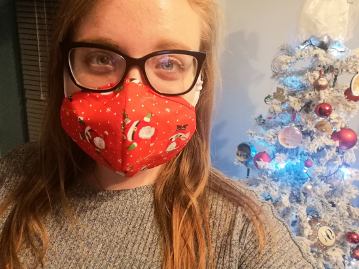
(Image courtesy of Laura O'Callaghan)
By Laura O'Callaghan
Face masks have become the fashion statement of the year (not by choice). Whether you’re heading to the shops, hopping on a bus, or studying in the library, masks have become a handbag essential. So why not bring some festive cheer with these DIY Christmas masks. This DIY is fairly easy and requires minimal skill and I have an even easier option for you, if stitching isn’t your forte. So, are you feeling thready?
I began making masks since they became compulsory in shops, I didn’t want to keep buying and throwing away disposable face masks, so these reusable masks are perfect. Also, if you’re like me, these masks are perfect if you want to avoid steamed up glasses.
As I have said, while this DIY does involve stitching, you can easily use fabric glue instead, just follow these instructions and replace the sewing with gluing. As well, this DIY doesn’t have to be Christmassy, swap out the Christmas fabric for florals or plain, or even an old t-shirt, the possibilities are endless.
I got the fabric and the elastic from Amazon, but as I said you can use an old t-shirt or some Christmas leggings that have seen better days. For the elastic you can either buy some or take a disposable mask and just cut the elastic string off. I would recommend making sure that the fabric you get is quite big. On Amazon just check the size of the fabric as it can be difficult if you get small scraps of fabric. But Amazon has a whole load of different fabrics, from Christmas to Harry Potter to Halloween (all of which I have bought and made).
The DIY:
You’ll need:
· A dinner plate to trace around.
· Fabric of your choice.
· Elastic for the straps.
· Needle and thread (or fabric glue if you prefer).
· A pen.
· Scissors.
Get Crafting:
1. Grab your dinner plate and your fabric and trace around the plate. Make sure that you trace the plate on the reverse side of the fabric just encase you make any mistakes.
2. Cut out the circle, I like to leave a little bit of an edge around the drawn line just so it gives you a little bit of extra room.
3. Fold the circle into quarters and then cut them to make four circle quarters. Pair them up and sandwich the up side of the fabric so you just have the reversed sides on the outside.
4. Now you can begin stitching or gluing the fabric together. Stitch or glue along the round side of the fabric. Do this for both pairs.
5. Unfold the two stitched pairs and sandwich them on top of each other, again making sure that the fabric you want to be on the outside is in the middle of the sandwich and the reverse sides are on the outside.
6. Then stitch or glue along the whole of the edges leave a three-centimetre gap at the end.
7. After you’ve stitched or glue turn the mask inside out using the gap you left at the end. Now just stitch up or glue that little gap so that there are no more holes left.
8. Take the corners of the mask and fold it over just a little bit and sew or glue that down – this is where we will attach the elastic.
9. If you’ve bought some elastic measure the elastic around your ear to the middle of your cheek to get the right size for you. Add another centimetre to you measurements as it will give you some room to play with.
10. Thread the elastic through the small gap you made when folding the edges. Tie the elastic together, you can hide the knot under the corners. Attach the elastic to both sides and then you are done!
It takes a bit of time but once you’ve done it a few times you’ll be quicker at making them. You can even go wild and add tinsel or glitter if you’re really looking to get into the Christmas spirit! While it make take time it is perfect to take your mind off things and gives you something else to focus on. Happy crafting!


Comments